A High-Flow MAF for the Mazda6i Airbox
This is an overview of how to modify the top portion of the
Mazda 6i airbox for a slightly larger Mass Air Flow (MAF) sensor tube. The
oversized MAF tube is sized to provide better air flow while minimizing the
calibration error of the MAF sensor which has been shown to cause CEL faults in
many aftermarket CAI products. This modification will be most beneficial if the
intake resonator, lower baffle tray, and VAD flapper restrictions are eliminated from
the stock intake. For more details on these mods, check out the 'how-to' section of
the Mazda6tech.com
web site.
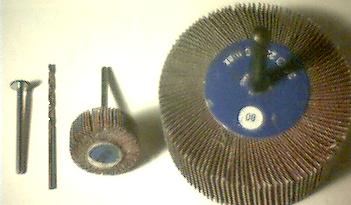
Besides basic tools, you will need a sharp razor knife, an electric drill, and a dremel along with the sanding and cutting bits shown above.
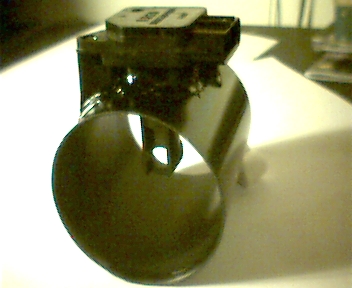
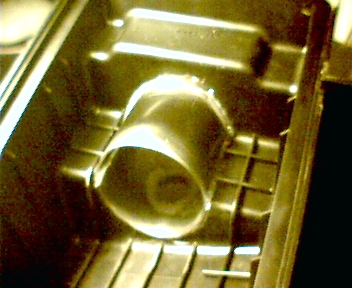
The first step is to fabricate a slightly oversized
MAF tube to replace the stock tube in the top portion of the airbox. A section
from a heavy 16 Oz. unbreakable plastic tumbler provides the right material for
the MAF tube. The finished tube will be 4 1/2" long with an inlet diameter
of 2 3/4" and an outlet diameter of about 2 5/8". This is just slightly
larger than the stock MAF tube (ID=2.5"), but provides approximatly 9% more
airflow area. (5.4 Sq In. vs 4.9 Sq In.) Note that the stock MAF sensor
is reused in the new tube.
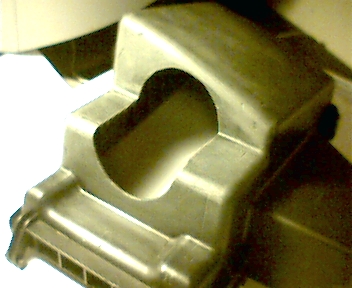
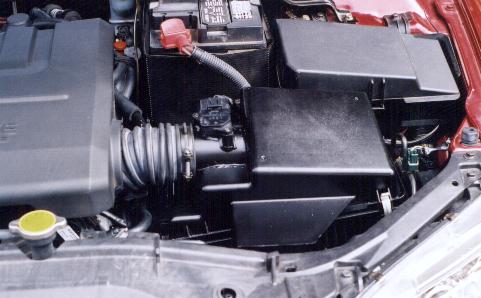
The next step is to cut the stock MAF tube out of the airbox
cover. First remove the airbox cover from the car by disconnecting the MAF
sensor, and the accordian tube and then rotate the cover just past verticle
to release the hinge from the bottom of the box. Once the cover is on the
bench, use a dremel cutting bit to slice the MAF tube out of the
cover. A 3/32" drill and razor blade were used for the lower arch where the
cutting bit would not reach.
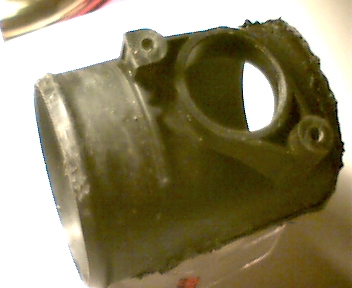
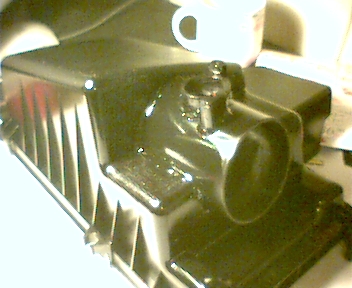
Once the MAF tube is cut out, smooth out the cuts and expand
the radius of the arcs to match the oversized MAF tube. Note that there are
four basic cuts needed: One along both sides of the tube, and one across
the top and bottom arch where the tube meets the airbox lid. The above picture
shows the location of the four cuts.
Next, fit the new MAF tube into the airbox. A flapper sanding
wheel and a file are helpful in trimming the cutout to fit for the new MAF
tube. Once a good fit is obtained, secure the new tube in place with JB
Weld epoxy. If you're using a quick-dry epoxy, work with several small batches
instead of trying to seal up all the seams at once. The epoxy sets up quickly
and won't flow smoothly into the seams if it's too hard.
After all the seams are filled with epoxy and dry, clean
up the airbox lid and give it a coat of black paint for uniform color and
a 'stock' appearance. Krylon's 'Fusion' paint is great for plastic and dries
in about 30-40 minutes.
Upon starting the car, you should see
your idle drop to the usual 750 RPM after a few seconds. The idle should
remain stable, but may 'hunt' occasionally during the first drive cycle.
Overall I have not experienced any drivability issues or CELs in the initial
testing. The benefits are readily apparent in both low end grunt and a new
willingness to build revs when you lean on the throttle.
This is not an easy or quick mod to perform but it will allow your airbox to provide the airflow benefits of an aftermarket CAI while preserving a more factory sound. If you've removed the basic restrictions on your stock Mazda6i intake, this modification will take full advantage of the extra air flow capacity and give your 2.3L Duratec a more aggressive attitude.
This is not an easy or quick mod to perform but it will allow your airbox to provide the airflow benefits of an aftermarket CAI while preserving a more factory sound. If you've removed the basic restrictions on your stock Mazda6i intake, this modification will take full advantage of the extra air flow capacity and give your 2.3L Duratec a more aggressive attitude.