The optimized throttle body will eliminate most of the top half of the throttle shaft and thin the lower half of this shaft. The butterfly plate will be attached to the bottom half the shaft using flush fitting, counter sunk screws.
What the optimized throttle body looks like when completed.
- 1/4" socket set, phillips screwdriver, flat file.
- Open ended hack saw or hack saw blade holder.
- Electric drill or drill press, 1/8" and 7/16" drill bits.
- #10x32 Thread tap and tap wrench.
- Dremel tool and 1/2" grinding stone.
- Fine emery cloth and a medium scotch brite pad
- Two #10x32 1", flat head, counter sunk brass screws
- Bottle cap from a bottle of Dasani water. (or similar)
1. Start off by removing the 'beauty cover' from your 2.3L Duratec. Next, remove the intake 'accordian' tube between the throttle body and the air box. Loosen the screws on both hose clamps, disconnect the PCV hose, and slip the small electrical relay out of it's mounting on the rear side of the accordian tube. If you have a CAI, remove the air tube and set aside.
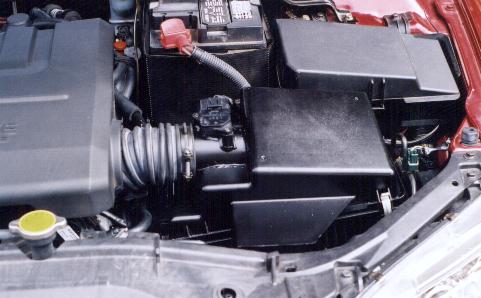
Remove the engine cover and accordian tube
2. Remove and plug each of the two coolant hoses attached to the throttle body. Also unplug the throttle body sensor/motor connector. Remove the (4) 8mm bolts holding the throttle body to the intake manifold and lift the throttle body out of the engine bay.
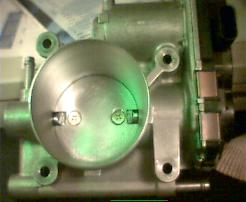
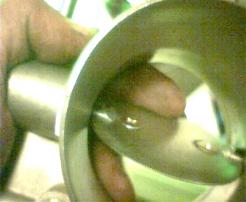
3. With the throttle body on a workbench, use a small block of wood (or screw-on bottle cap) to hold the throttle plate in the wide open position. Carefully clamp the throttle body in a vice and use a hack saw blade to remove any excess threads protruding from the back of the throttle body shaft. File the screw ends flat and even with the back of the shaft. Be careful to not damage the rubber seal on the manifold side of the throttle body. (Remove and set aside.)

Remove any threads protruding past the shaft's surface.
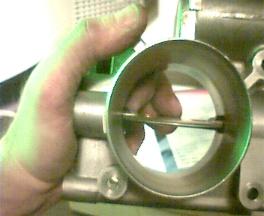
4. Remove the block and allow the throttle plate to close. Use a screwdriver to remove the screws securing the butterfly plate to the throttle body shaft. If the screws will not loosen, They can be drilled out using an electric drill and a 1/8" bit. Retap the screw holes using a #10x32 thread tap.
Note the rubber seal is still in place in this picture.
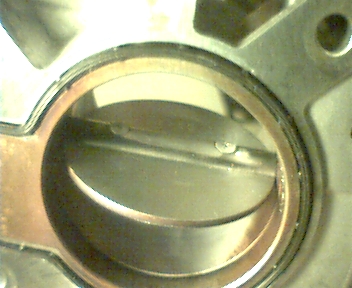
Remove the screws holding the butterfly plate
5. Using your fingers, turn the throttle shaft to the open position and use a thin scrap of steel and a small block to hold the shaft in the open position. Carefully clamp the throttle body in a vice and use a hack saw blade to remove the center section of the top (unthreaded) half of the throttle body shaft. Turn the throttle body over and file the bottom portion of the throttle shaft to a flater profile.
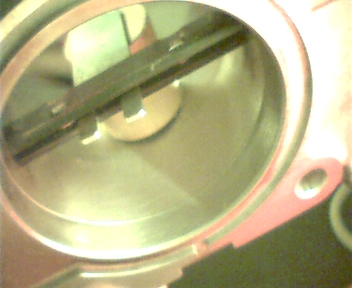
Cut the upper part of the shaft just outside the screw holes.

Larger counter sunk holes in the throttle plate.
8. Holding the throttle shaft in the open position, slide the butterfly plate back onto the throttle shaft. Make sure the counter sink holes are facing up and align the screw holes of the shaft and plate. Secure the plate to the shaft using #10-24 brass flat head screws. If the screws heads do not fit flat against the plate, remove the screws and file the flat head until a flush match with the plate can be achieved. Use Locktite on the screw threads during final assembly.
Butterfly plate with countersunk screws installed
Reinstall the rubber seal on the back of the throttle body and remount it on the intake manifold using the four 8mm bolts. Re-attach the coolant lines, electrical connector for the throttle sensor, and the accordian tube.
The modified throttle plate and shaft will be thin and smooth.
